Full steps of Ubuntu installation (with GL stuff)
- 0. laptop info
- 1. install the system
- 2. install nvidia dirver
- 3. install cuda-toolkit
- 4. install GL stuff
- 5. install project stuff
- 6. install personal software
- 7. change the theme with Tweaks
- 8. unimportant changes
- X. Ubuntu Using Tips
Toc generated by markdown-toc.
This doc includes two parts of Installations and PersonalSettings.
0. laptop info
- MSI GE62 490, with an Nvidia GeForce 960M graphics card
- the core is intel i7-6700HQ with an inside graphics card
- single system (ubuntu-18.04-LTS)
1. install the system
1.1 prepare a USB installer - with another computer
Note: official iso (ubuntu-18.04.4-desktop-amd64.iso)
1.2 turn off the secure boot in BIOS
1.3 follow and finish the standard installation process
Note: do NOT set grub (eg. nomodeset) if you can install smoothly. After setting ubuntu’s configuration, you can log into the new Ubuntu system (now, with the core graphics card and drivers)
1.4 agree the 1st time update require, then reboot
Note: when you first get into the Ubunutu, you may get a piece of update information, DO agree that, the principle is that we agree with all updates during the process of installation, but after we get a stable and complete system, then we stop update anything, try to keep the system having no change, if not, there might be some conflict between the new updates and the old drivers.
2. install nvidia dirver
2.1 add repository then we can check devices
Note:we get the recommendation version here!
$ sudo add-apt-repository ppa:graphics-drivers/ppa
$ sudo apt-get update
$ sudo ubuntu-drivers devices
2.2 install drivers in APP - Software and Updates
Software and Updates ->
    additional drivers ->
        select the recommandation version ->
            apply
2.3 do NOT set blacklist of nouveau or set grub.
Note: all stuff could be handled automatically by system if we use this way to install the drivers, we do nothing then it would be worked very well with Nvidia drivers!
Now, the installation of the Nvidia driver was finished. You can use nvidia-smi to test if it’s ok (screenshot:http://i.imgur.com/GgfSqCM.png) or just check the system information and see the drivers name. (screenshot: http://i.imgur.com/Euj6tQy.png)
3. install cuda-toolkit
3.1 select cuda-10_* or another version
(screenshot: http://i.imgur.com/6xPtxju.png)
3.2 execute
$ sudo chmod 777 cuda-10_\*.run
$ sudo sh cuda-10_\*.run
3.3 type NO in the process
Note: we have installed the driver by ourselves, so here say no.
Install NVIDIA Accelerated Graphics Driver for Linux-x86_64 410.48?
(y)es/(n)o/(q)uit: n
3.4 test samples
$ cd /usr/local/cuda/samples
$ make
  (10 minutes later)
$ cd /usr/local/cuda/samples/bin/x86_64/linux/release
$ ./deviceQuery
(screenshot: http://i.imgur.com/jJ7vpNw.png)
3.5 extra IMPORTANT config
Note: add two environment params into /etc/profile, if not, maybe you could get the error says: libcudart.so.10.0: cannot open shared object file: No such file or directory
export PATH=/usr/local/cuda/bin:$PATH
export LD_LIBRARY_PATH=/usr/local/lib:/usr/local/cuda/lib64/
Now cuda installation is finished, actually, with samples’ test, we can also make sure that the GPU driver worked well.
4. install GL stuff
4.1 for GL/gl.h use
sudo apt install mesa-common-dev
4.2 GL/glu.h
sudo apt install libglu1-mesa-dev freeglut3-dev
4.3 others
libglfw3-dev libgles2-mesa-dev libglew-dev libeigen3-dev
4.4 just use all-in-one command
Note: they are all necessary to install, and maybe you need to install more libs, it’s up to your code.
$ sudo apt install mesa-common-dev freeglut3-dev libglfw3-dev libgles2-mesa-dev libglew-dev libeigen3-dev
5. install project stuff
5.1 base tools
$ sudo apt install vim
$ sudo apt install cmake
5.2 rebuild project
$ cd ProjectionExplain/LIBRARY/glui-master
$ rm CMakeCache.txt
$ make clean
$ mkdir build && cd build
$ cmake ..
$ make install
$ cd ProjectionExplain/
$ make clean
$ make
$ ./projwiz -f DATA/segmentation lamp
All stuff about GL-project has been done! (screenshot: http://i.imgur.com/rDCtEId.png)
6. install personal software
6.1 screenshot: flameshot
use sudo apt-get install flameshot
set the shortcut (screenshot: http://i.imgur.com/id2PPYj.png)
6.2 vscode
..more settings could be found in chapter 8.5..
install it directly in APP (Ubuntu Software). (screenshot: http://i.imgur.com/W971ERc.png)
then, we can program code with vsc
- open folder (ProjectionExplain)
- Terminal->new terminal->make && ./projwiz -f DATA/segmentation lamp
6.3 git
- settings
Just use sudo apt install git to install git, then, we can make some settings to let us push/pull the remote bucket with no need of password and username.
Note: I use Github to back up my project, these options are also worked for other git servers.
$ ssh-keygen -t rsa -C "YOUREMAIL"
$ vim ~/.ssh/id_rsa.pub
$ eval "$(ssh-agent -s)"
$ ssh-add ~/.ssh/id_rsa


Then go Github -> Settings
      -> SSH and GPG keys -> New SSH key
You need to copy the content of rsa.pub to here.

$ git config --global user.name "YOURUSERNAME"
$ git config --global user.email "YOUREMAIL"
Till now, we have finished the setting, and you could pull or push your code without username or password, but note that you must use SSH_URL to do these options.
- use case
Go to Github and create a new repository named by your project name. Then use git clone git@xx.git to pull it into your system. Lastly, move all your project files into this git folder, and run the commands:
git add -A
git commit -m "`date +%Y-%m-%d,%H:%m`"
git push -u origin master -f
Now your code should be pushed into Github.com and if you’d like to control the part of code that uploaded, then you need to change the file named .gitignore. And in my cases, I usually write these git commands into a *.sh file so that I can run it just use one command like ./push.sh, to do this, you need to add #!/bin/sh into the *.sh file. With this file, you can also use crontab or something else to push your code automatically. Every time you want to back up your code, just run this sh file then backup done.
#### 6.4 remote desktop
I think a good remote application is very important for me and many other Ubuntu users. From my experience, I highly recommend the application named Anydesk, which is really easy to insatall and use.
Win@Linux -> use Anydesk
wget -qO - https://keys.anydesk.com/repos/DEB-GPG-KEY | apt-key add -
echo "deb http://deb.anydesk.com/ all main" > /etc/apt/sources.list.d/anydesk-stable.list
apt update
apt install anydesk
Linux@Linux -> ues rdesktop
Firstly, download the latest release in https://github.com/rdesktop/rdesktop/releases, then cd into the file path, and run the following commands:
% ./configure
% make
% make install
6.5 MS Softwares / Outlook*
These are all light lunchers just aim to open the pages in your local browser.
sudo apt update
sudo apt install snapd
sudo snap install unofficial-webapp-office
6.6 Teams*
You can find this in Ubuntu Softwares.
6.7 Snow Flake SSH*
You can find this in Ubuntu Softwares.
6.8 Krita*
You can find this in Ubuntu Softwares.
6.9 Wechat*
This is the light way to use Wechat without wine or other extra environments.
sudo apt install snapd
sudo snap install electronic-wechat
6.10 picgo
Everytime you want to share or publish your screenshot or othem images, then try to use PicGo. It’s a useful tool that includes many kind of image-bed, the usage of it in Ubuntu is similar to the wine qq.
Firstly, get picgo.png and make your own desktop file (any path is ok, mine is Downloads/)

$ wget https://raw.githubusercontent.com/TianZonglin/tuchuang/master/img/opic.png
$ vim QQ.desktop

Secondly, copy the content, save and quit.

[Desktop Entry]
Name=PicGO
Exec=/home/tzloop/Downloads/PicGo.AppImage
Icon=/home/tzloop/Downloads/opic.png
Type=Application
StartupNotify=true

Then, right-click the file, in permission page -> allow it execute as application
Finally, copy it to your system applications' folder.
If you want to upload images by clipboard, you need to use sudo apt install xclip to install xclip. The quick settings of Github’s image-bed are below.
repository name -> GITHUBACCOUNT/tuchuang
branch name -> master
token -> get a new one from Github (Settings -> Developer Settings -> Personal access tokens)
storage path -> img/
custom domain name -> https://cdn.jsdelivr.net/gh/GITHUBACCOUNT/tuchuang
6.11 qBittorrent
You can find this in Ubuntu Softwares.
6.12 baiduNetdisk
You can just open one baidu netdisk resources in your browser, and try to download something, the webpage will try to open the netdisk application, and if you don’t have it, it would give you a download window to choose which .rpm or .deb you’d like to install. Or you can just download the .deb package with this (maybe not working),
https://issuecdn.baidupcs.com/issue/netdisk/LinuxGuanjia/3.5.0/baidunetdisk_3.5.0_amd64.deb
6.13 Install ADB & Fastboot on Ubuntu 18.04 / Linux Mint 19
ADB comes included with Google’s Android SDK but the package can be installed independently on Ubuntu 18.04 / Linux Mint 19. Install both ADB & Fastboot by running the commands below.
$ sudo apt update
$ sudo apt-get install android-tools-adb android-tools-fastboot
Get ADB version details.
$ adb version Android Debug Bridge version 1.0.36 Revision 1:7.0.0+r33-2 If you try list for connected devices, ADB server should be started if not already running.
$ adb devices List of devices attached daemon not running. starting it now on port 5037 * daemon started successfully *
The Service can also be started by running:
$ sudo adb start-server
You must enable USB debugging on your device to use adb over USB. Navigate to system settings, and enable it under Developer options. To reset your adb host, run:
$ adb kill-server
6.13 CNCNet
If you want to play RedAlert2 or Yuri’s Revenge with your Ubuntu, the easiest way is to install cncra2yr.
- install cnc –> snap install cncra2yr.
- download game files –> download any version you like (just download the windows version).
- open cnc app and copy files (.mix and .dll) to the right path.
- install, wait seconds.
- enjoy & play.
7. change the theme with Tweaks
7.1 install tweaks and its extensions
$ sudo apt install gnome-shell-extensions gnome-shell-extension-dash-to-panel gnome-tweaks adwaita-icon-theme-full
then logout and login system or reboot.
7.2 change menu style
(extension: applications menu) Note: turn on this extension could display the app manager like windows starting menu. Here I just changed the margin of the application and hide the application’s icon and show the desktop’s button (like windows).
7.3 change the wallpaper
7.4 change the panel and put icons on the desktop
The default style of the dock is not same as Windows, and the desktop is not very important while using Ubuntu, but here the idea is to change Ubuntu looks like Windows in every detailed area, so here, we still need to do two things: put icons onto the desktop and change the original style of dock.
There are several paths that could include installed applications, which means we need to go to different folders to find those icons. The paths below are some possible locations you need to check. Then just drag out and put the icon onto the desktop. You will see these icons become files like *.desktop, don’t worry, just double-click them and click ‘Trust and Launch’, then they could change back to the normal icons.
/usr/share/applications
/var/lib/snapd/desktop/applications
~/.local/share/applications
Then we need to use Tweaks to change the panel/dock.
Open Tweaks -> Extensions
      -> turn on the 'applications menu'
      -> turn on the 'Dash to panel' -> open settings
            -> Location and Style
                  -> panel location -> bottom
                  -> panel size -> 45px
                  -> icons margin -> 5px
                  -> indicator -> open settings
                        -> height -> 0px (we hide it by this)
                  -> clock location -> right
                  -> task panels -> left
            -> Behaviors
                  -> turn off 'favoriate applications'
                  -> turn off 'applications icon'
                  -> turn on 'show desktop'
                  -> turn off 'cancel applications' group'
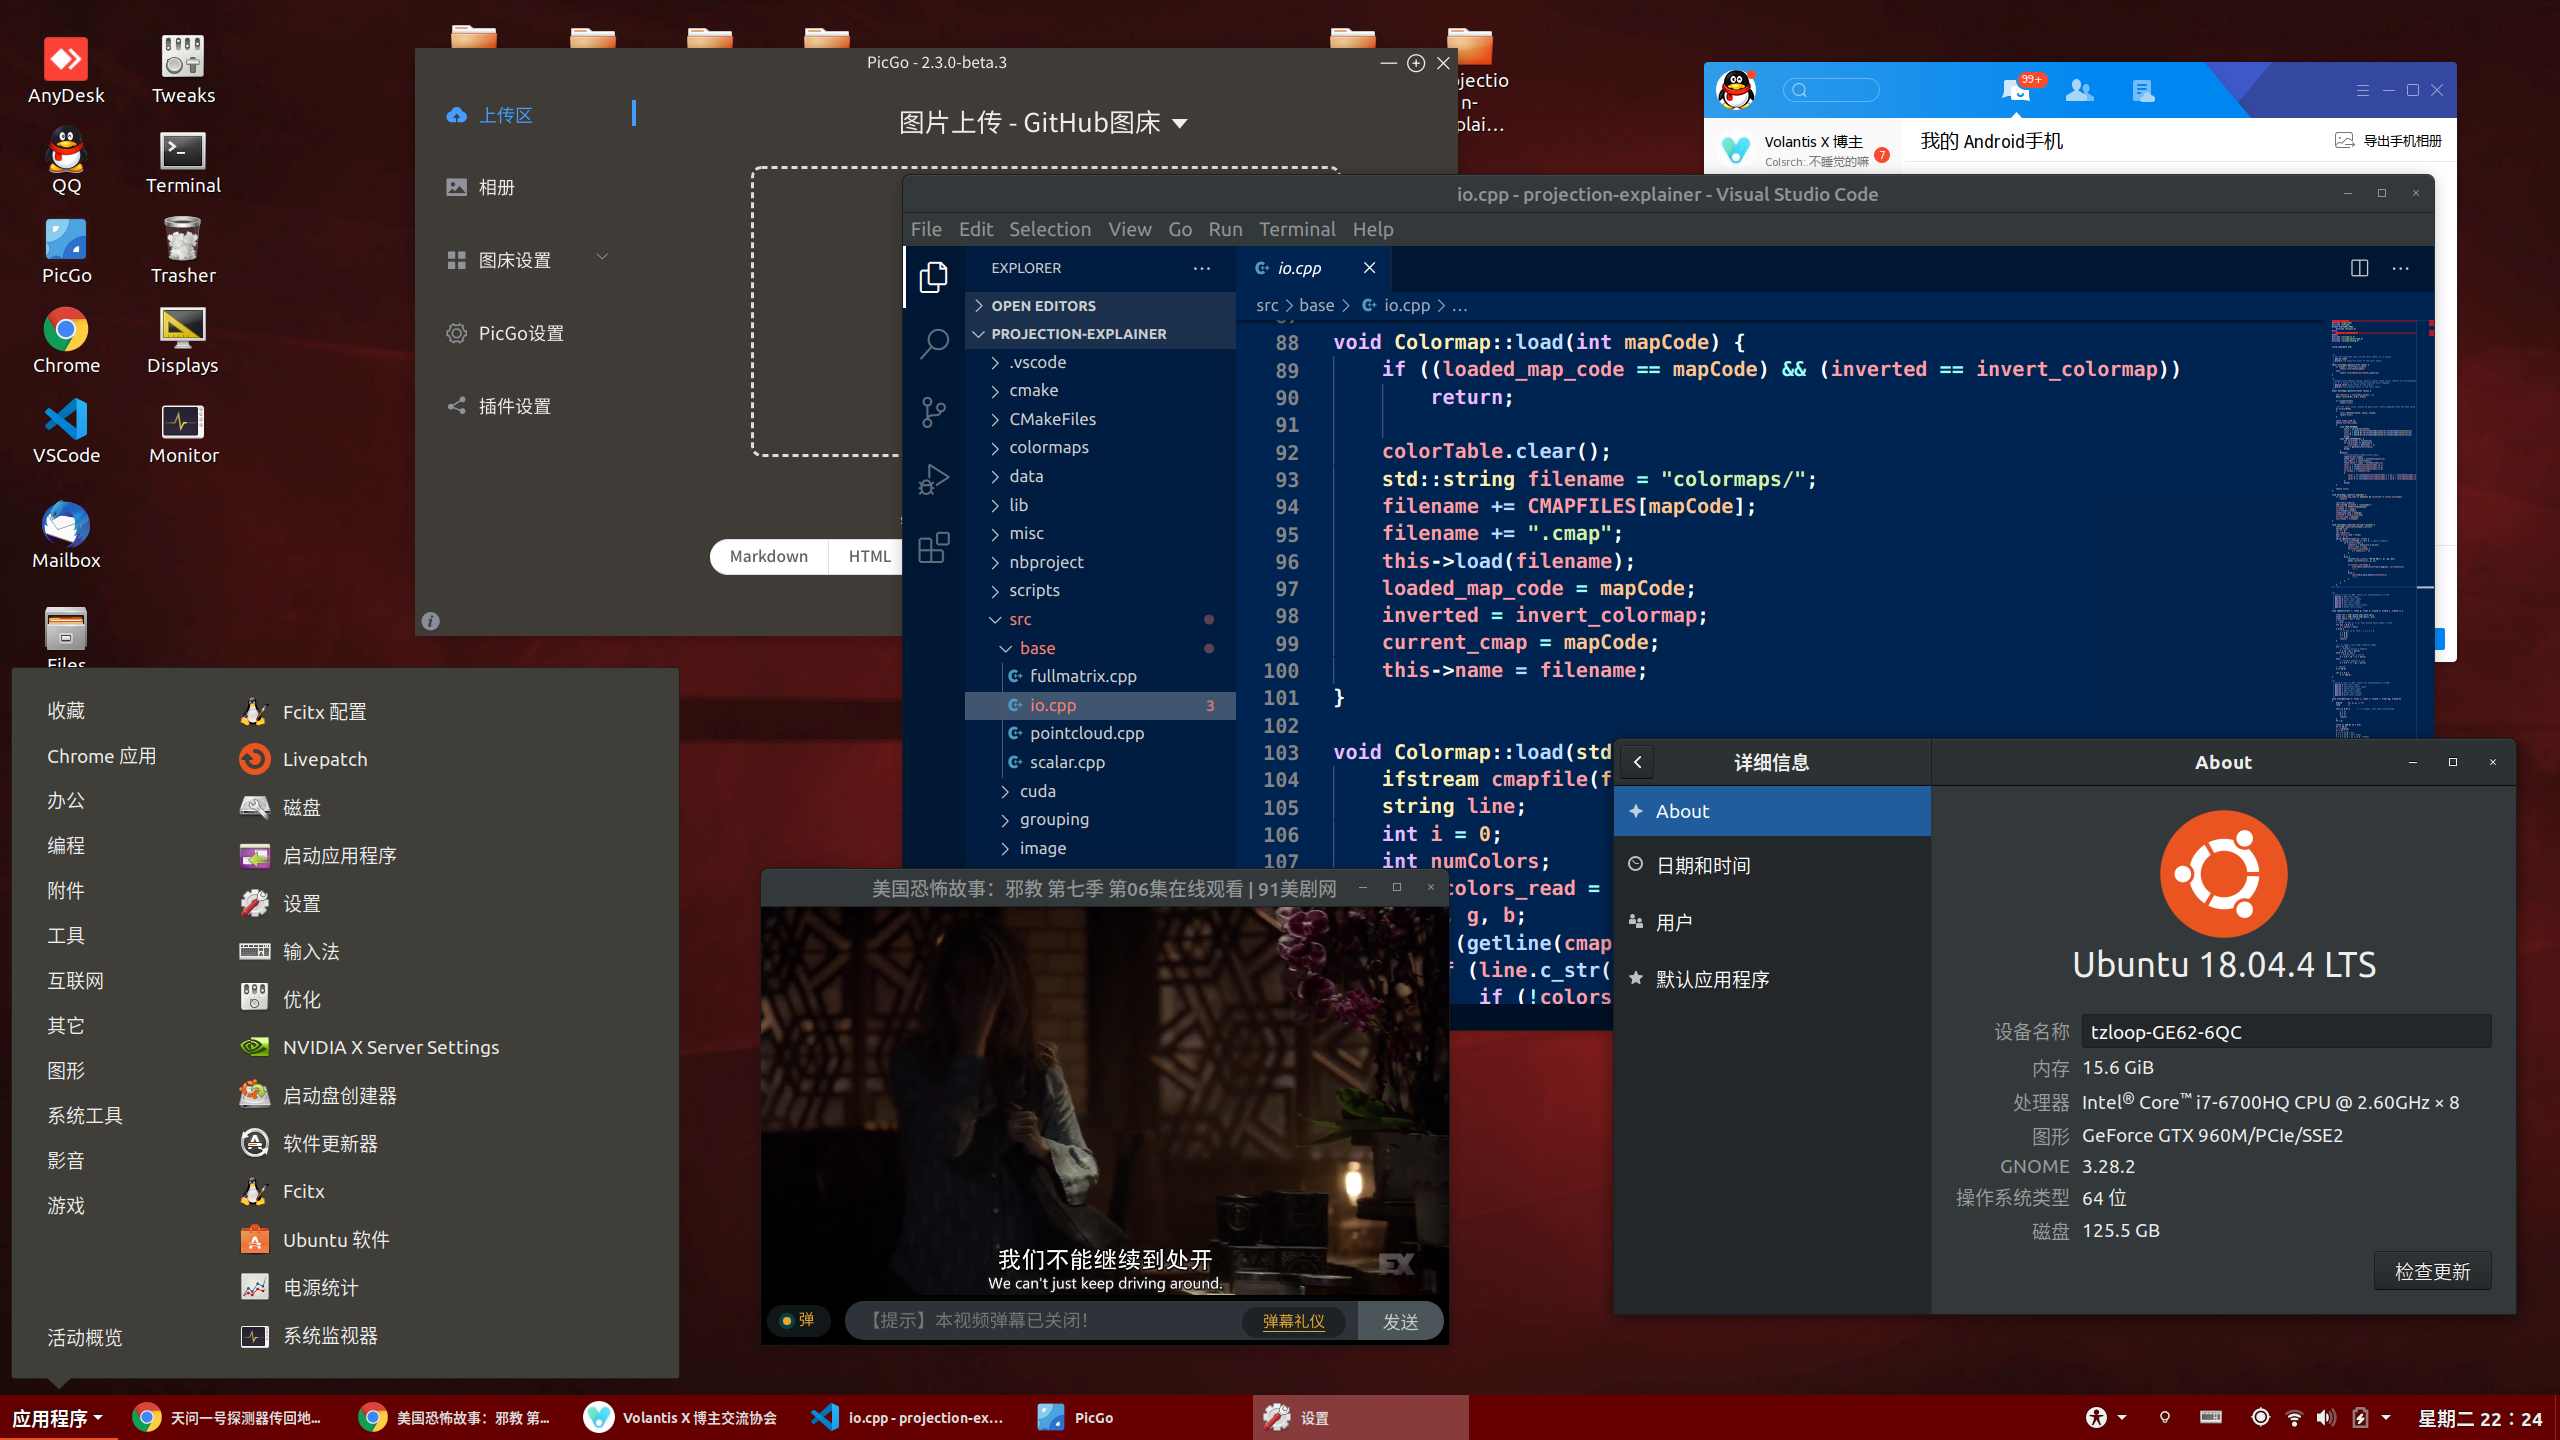
Till now, the basic theme set has been finished, and the style now is very similar (98%) to the Windows desktop. (screenshot: http://i.imgur.com/y7safc9.png)
8. unimportant changes
8.1 add support of Chinese
- add extra language in the system
Go to Settings
-> Region & Languages
    -> manage installed language
        -> if get the message of 'installed not complete' then just install
            -> click 'Install/Remove Languages'
                -> choose Chinese then install (maybe need double-click)
            -> then in 'Language for menu and windows'
                -> drag Chinese up to the 1st position
-> now in 'Region & Language', the Language has been changed to Chinese automatically.
Note: After reboot, System now could be displayed by Chinese. If you get the message about ‘change public folder names’ like Downloads, Pictures, Videos, then I suggest that let the system keep the old/English name, cause Chinese characters could be hard to use in terminal or code.
- install SogouPinyin
Note: Download the package from Browser, Linux_64-bit.deb. Then, just click the deb file and click ‘install’. If you use an old Ubuntu version, just follow this page. After that, you also need to reboot the system.
- install fcitx and change the input source to SogouPinyin
$ sudo apt install fcitx
then, go to Settings
    -> manage  installed language
        -> change the  'Input System'(default is IBus) to fictx
        -> then click  'apply system-wild'
-> Now , you'd better to reboot, then
    -> find 'keybord icon' in the task bar (default location is top-right corner)
        -> click 'configure current input method'
            -> then you could see SogouPinyin has been there.
                 We can delete that 'Wubi' so that we just keep English and Pinyin for us.
 Now we finished all stuff. The default change-key is the single click of 'Shift'.
Note: the above three parts are not the same thing, please set them one by one. And always remember to reboot the system or you maybe can’t see the additions. If you think the panel of SogouPinyin is too small to watch, then you can modify it in its settings.
With Chinese support, we can then set more slight changes with Tweaks (screenshot: http://i.imgur.com/l5sLZwZ.png).
8.2 change screen resolution
- connect high-resolution (second) screen
- make a command set with xrandr of high-resolution configuration, like 2k. There are 3 commands we can put them in *.sh file, the 3rd line is to use xrandr to set primary monitor and turn off the laptop’s screen.
Firstly, we need to get some specific parameters.

$ cvt 2560 1440
//the output here is what we used in xrandr below
$ xrandr -q
//check display monitors, we need to make sure the ID of the primary and second screen, here are eDP-1-1(primary) and HDMI-1-2(second).

(just 3 lines):

xrandr --newmode "2560x1440_55.00"  284.00  2560 2744 3016 3472  1440 1443 1448 1489 -hsync +vsync
xrandr --addmode HDMI-1-2 "2560x1440_55.00"
xrandr --output HDMI-1-2 --mode "2560x1440_55.00" --output eDP-1-1 --off
- finally, just find a way to execute the 3 commands, you can run them with ‘sh *.sh’ or let them executed automatically after we login system.
quick way :
    -> just put these 3 lines into the end of /etc/profile,
    -> then, reboot, you could find the monitor was switched by itself.
Note: the original system doesn’t support higher resolution more than 1080, so we need to add new resolution and trigger the change.
8.3 add support of Windows software
like tencent qq, or redalert2, or other applications.
- method-1: install wine from Ubuntu-Software, then install windows apps with wine. With this, we could paly redalert2 or chat with windows-qq in ubuntu.
- method-2: install an android simulator, I highly recommend this one (download link), it’s stable and fast and could give us the same using-experience of the android pad, if you just want to use qq or wechat in ubuntu, you need to try this. (screenshot: https://cdn.jsdelivr.net/gh/TianZonglin/tuchuang/img/Cache_32799f853a0e21fe..jpg)
Note: I found a quick way to use the wine qq in Ubuntu, even you DON’T need to install wine. To do this, you need to go to this Github page and download the *.AppImage file from its release. Then, just use two commands to run it. That’s all. this appimage includes a minimum wine inside and you just do nothing, download then use it!
$ chmod a+x TIM-x86_64.AppImage
$ ./TIM-x86_64.AppImage.AppImage
(In my machine, the appimage of QQ can’t work well with some problems about showing characters, so I just use TIM instead.)
If you want to open it by icons, then you can make a *.desktop file by yourself, then put this file into ~/.local/share/applications, after that, you can find your desktop icon in ‘applications’ (search it), right-click and add it to the favorite, then, you will find your own desktop icon appears in the dock.
Firstly, get qq.png and make your own desktop file (any path is ok, mine is Downloads/)
$ wget https://cdn.jsdelivr.net/gh/TianZonglin/tuchuang/img/qq.png
$ vim QQ.desktop
Secondly, copy the content, save and quit.
[Desktop Entry]
Name=QQ
Exec=/home/tzloop/Downloads/TIM-x86_64.AppImage
Icon=/home/tzloop/Downloads/qq.png
Type=Application
StartupNotify=true
Then, right-click the file, in permission page -> allow it execute as application
Finally, copy it to your system applications’ folder.
$ sudo cp /home/tzloop/Downloads/QQ.desktop ~/.local/share/applications
8.4 some unessential changes with Tweaks
- theme -> Adwaita-dark
- cursor -> Adwaita-default
The default font family  (4 items) are :
    Ubuntu/11, Ubuntu Regular/11, Sans Regular/11, Ubuntu Mono Regular/13.
then I set 1-3's font family to Ubuntu Medium with the same font-szie but zoom ratio is 1.13.
8.5 other useful tools and settings
8.5.1 brightness control
I use RedShift here, other similar software like F.lux is good as well. Using RedShift is simple:
-> install it with `sudo apt-get install redshift-gtk`, gtk means visual version.
-> open location service: Settings -> Privacy -> Location service -> open. (this step is ESSENTIAL)
-> open redshift, if you can't find the icon, just search it in 'applications'.
-> then, brightness will be changed
-> finally, with its menu, you can set it open with your system.
8.5.2 vscode preferances
@theme
File -> Preferences -> Color Theme, I’d like to use Tomorrow Night Blue, which is also a kind of dark theme but could also work well in the day time.
@font
File -> Preferences -> Settings, then we use ‘search’ (search ‘font’) to locate the items that we need to change, I’d like to set these parameters by JSON format, and the programming stuff settings are as below:
{
    "terminal.integrated.fontFamily": "monospace",
    "editor.fontWeight": "600",
    "editor.fontFamily": "monospace",
    "editor.fontSize": 15.5,
    "terminal.integrated.fontSize": 12,
    "workbench.colorTheme": "Tomorrow Night Blue"
}
I like this combination, it worked very well in my 2k screen.
If you want to make the font same with vscode in Windows (specifically, it’s Consolas), then you need to install new fonts manually, you can’t use new fonts if you don’t install them at first.
$ wget https://down.gloriousdays.pw/Fonts/Consolas.zip
$ unzip Consolas.zip
$ sudo mkdir -p /usr/share/fonts/consolas
$ sudo cp consola*.ttf /usr/share/fonts/consolas/
$ sudo chmod 644 /usr/share/fonts/consolas/consola*.ttf
$ cd /usr/share/fonts/consolas
$ sudo mkfontscale && sudo mkfontdir && sudo fc-cache -fv
//check the installed fonts
$ fc-list
@terminal’s location
Just search ‘location’ in settings and change Workbench › Panel: Default Location from bottom to left, because I want to have more vertical space to read long codes while we usually don’t write long sentences/codes in lines, so it has more free horizontal space that we can settle the terminal.
@files display order in Explorer (left area)
Just search ‘explorer.sortOrder’ in settings and set it sorted by ‘type’, it’s useful for some make/cmake projects, which has a lot of *.cpp or *.o files, they’re mixed with the default setting, but it should be sorted by type so that we can have a clear group of different files.
The final view of vscode in my Ubuntu like this: (screenshot: http://i.imgur.com/g7OehEL.png)
X. Ubuntu Using Tips
X.1 updates
just delay the update checking (I don’t know how to stop it)! do NOT cancel the ‘update from’, or you would get errors when you install new packages/tools/… (screenshot:http://i.imgur.com/w7Kvc7X.png)
X.2 when desktop crash
like stucking when turning off some windows or stucking after running something for a long time. When this happened, do NOT shut down the system by cut down the power! that’s a dangerous behavior, system core may be ruined by this.
the right way is: Ctrl+Alt+F2/3/4, log into the tty2/3/4, then restart gdm/lightdm, or rollback the wrong options here if you remember. Or do nothing, just wait for the system rerun again, sometimes it could be reworked after waiting a while.